After a pause while I waited for new hardware to arrive and enough free time to play with it I returned to experimenting with my FRDM-KL25Z. After having tried both the Mbed library and Processor Expert I thought it was time to remove the training wheels and learn to use this thing properly. Both Mbed and PE have their uses, but they hide many important details about how the device functions that I need to know. After figuring out how to configure GPIO pins manually (I recommend this series of articles if you want a gentle introduction to how to use clocks and GPIO pins on the KL25Z) and writing a simple program in C++ (C is a good language, but C++ is so much easier to work with) the only thing I was missing was FreeRTOS. This will not be a complete guide to installing FreeRTOS. I will refer you to other guides that can take you through that part. These are only a few notes and suggestions that should help you avoid some of my mistakes.
As you may already know, there is no official port of FreeRTOS for the Kinetis L series of ARM Cortex M0+ MCUs. Fortunately there is an unofficial port by Erich Styger. The bad news is that the port is built around PE, and your will need to set it up together with Eclipse if you want to use FreeRTOS. The good news is that you only need to use it once and export the necessary code. Once you are done you can use whatever development tools you want.
Before you go any further you must follow Styger’s instructions for how to set up PE with Eclipse, and while it isn’t necessary you should also read his instructions for setting up and configuring FreeRTOS with PE. Play around with it. Make sure that it is working. Then read his instructions for generating static code from the FreeRTOS PE component that can be extracted and used on its own.
If you follow the instructions you will be left with a folder with all FreeRTOS code. Now comes the tricky part: using it in a project without PE. The exact details will depend on the tools and libraries you are using. In my case I wanted to create a C++ project in Eclipse using the GCC-ARM Eclipse plugin. I will go through some of the steps I had to take to get it to work and point out a few things that gave me trouble.
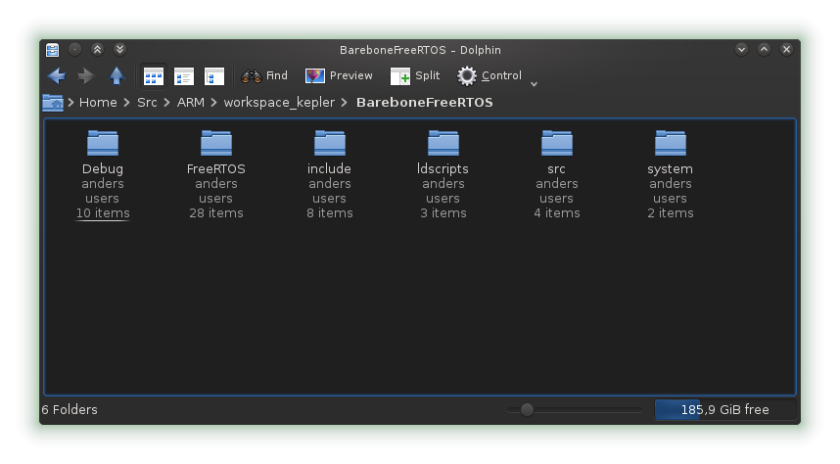
Once you have created a static copy of the FreeRTOS code, move it into your new project.
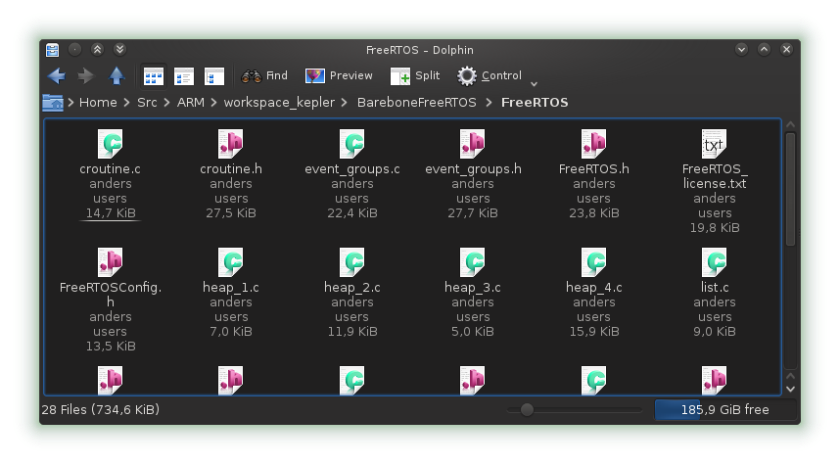
I put all FreeRTOS files in one folder to simplify things.
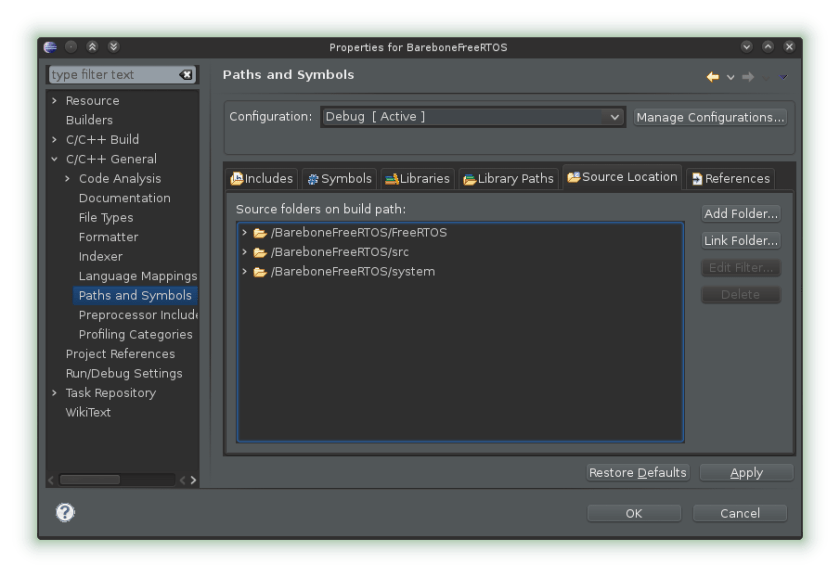
Open the project properties and make the FreeRTOS folder a source folder.
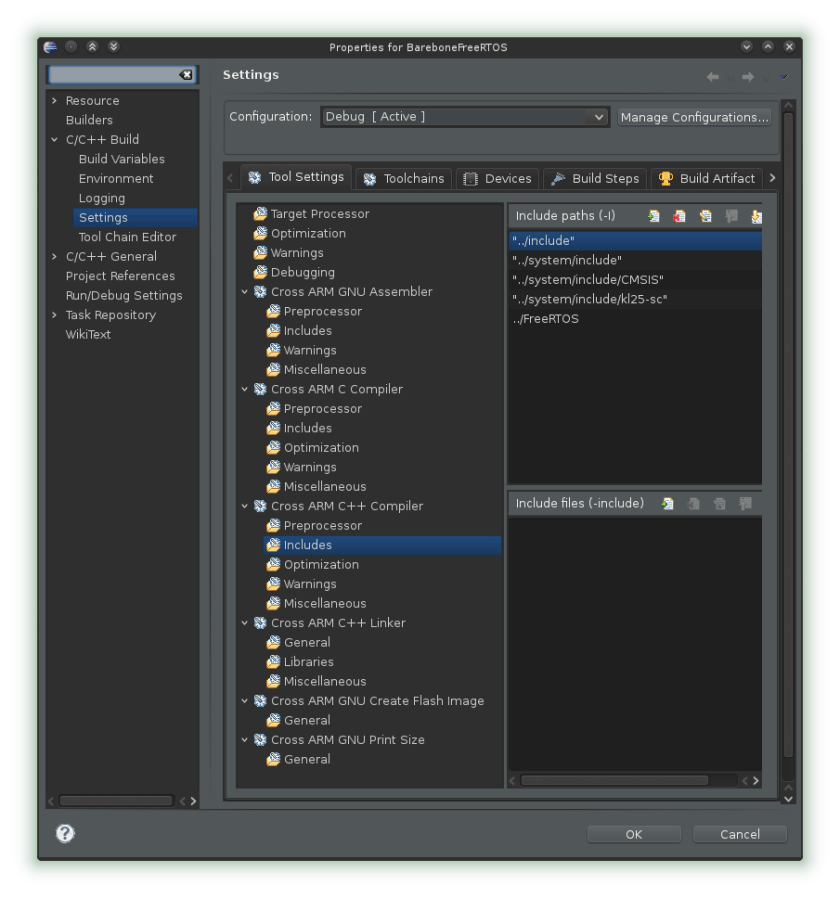
Go to the build settings and also add the folder to the include path.
This should be enough for Eclipse to find all the new files, but if you now try to compile it you will get a long list of errors. Most of these are simple things that are easily fixed.
Getting interrupts to work was the hardest part. It is quite simple once you know what the problem is, but it was not obvious. The FreeRTOS code you have is set up to use the interrupt handlers and interrupt vectors created by other PE components. Since you do not have those components you must modify some parts of the code.
First, copy the ‘Events.h’ and ‘Events.c’ files from your PE project, remove all interrupt handlers not starting with FRTOS_ (assuming there are any), and then remove the FRTOS_ part of all function names (e.g. vApplicationIdleHook instead of FRTOS_vApplicationIdleHook). Do a search through all your other FreeRTOS code and do the same there (or wait for the compiler to complain). Some function names will be incorrect. If you are using C++ also make sure that the event files are enclosed within extern blocks. They will be used both by FreeRTOS’s C code and your C++ code.
Next, if you are not using the interrupt vector you got from PE and instead uses the one from the GCC-ARM plugin (‘vectors_MKL25Z.c’), then you will have to change some function names. FreeRTOS uses a couple of interrupt handlers.
SysTick_Handler
SVC_Handler
PendSV_Handler
Your FreeRTOS code and ‘vectors_MKL25Z.c’ will use different names for these interrupt handlers. This must be fixed.
The rest should be easy. There will be some inclusions of header files to remove and some that must be added, and a few function and variable names will be wrong. You also have to configure FreeRTOS (unless you did so before exporting the code). This is done in the ‘FreeRTOSConfig.h file’. Refer to FreeRTOS’s documentation for more information about that part.
Last week I set out to find a reliable and permanent solution to my problems with unread system mail and undelivered cron error messages, and I can now see that sending, delivering, and receiving email is far more complicated than I had thought. I have had to learn more about SMTP, SSL/TLS, and email delivery than I ever wanted to know, and I still only know the bare basics.
When I started I had two requirements:
All local email sent to the root user (and preferably everyone else) must be forwarded to an external SMTP server and email account
All email that leave my network must be encrypted
After experimenting with number of different applications (GNU Anubis, Nullmailer, ESMTP, MSMTP, etc) I finally found something that worked; Postfix with GPG-Mailgate. If all you need is the ability to send email to an external account then there are other applications you could use instead (I had some success with MSMTP and Nullmailer). The advantage of using Postfix is its flexibility and maturity. All other applications I tried had some small thing they could not do reliably or would fail in some edge cases, such as only forwarding some of the emails sent to root, but not quite all of them.
This guide will show each step needed to set this up, and a few mistakes to look out for. The first part will cover Postfix and how to configure it to forward all emails sent to a local user to an external email account. The second part will show how to set up GPG-Mailgate so that all emails that are sent to certain accounts are encrypted with GPG before they leave the server. If all you need is mail forwarding then you can stop after the first part, and if you already have Postfix configured you can jump straight to the second part.
A few assumptions will be made in this guide.
You are using the root account. If you are not then you will have to prepend ‘sudo’ to some commands.
You are using Debian. Everything should still work if you are using a different Linux distribution, but you may have to make some minor changes.
Names and servers
I will be using the following user names, email accounts, and servers in this guide.
User names
root : The local root user
gpgmap : The user account used for GPG-Mailgate
Email accounts
root@server.localdomain.com : The fully qualified email address of the root user
user@emailprovider.com : An external email account that we want to send email through
admin@anotherdomain.com : An external email account that we want to forward all local emails to
Domains
yourdomain.com : Your local domain
emailprovider.com : The domain of your email provider
anotherdomain.com : The domain of the email provider for the account you want to forward all local email to
Servers
smtp.emailprovider.com : The SMTP server of your email provider
server.yourdomain.com : The computer you want to forward local emails from
Part 1 – Forwarding local email to an external SMTP server
The first step is to install and configure Postfix to forward all emails sent to the root user (or any user you want) to an external SMTP server and email account. This is not difficult, but it does require a few steps.
First, if you do not already have Postfix install it and some dependencies.
apt-get install postfix libsasl2-modules
Fill in any domain names the installer asks for and choose the “satellite” option.
If you are not already using Postfix then you are probably running Sendmail. Before starting Postfix you will have to turn it off. To avoid future error messages and warnings I also recommend you completely uninstall it.
service sendmail stop

apt-get remove sendmail-base sendmail-cf sendmail-doc
Next, start postfix.
service postfix start
Make sure that it started correctly.
service postfix status
Next comes the hard part (not really); configuring Postfix. The exact details depends on your email provider. Everything I describe here will be completely compatible with Gmail.
Most of the settings you need should have been configured for you by the installer.
Open ‘/etc/postfix/main.cf’ and make sure that the relay host is set to your email provider’s SMTP server.
The SMTP hostname and port must match relayhost in the main.cf file.
Update Postfix’s password database and settings.
postmap /etc/postfix/sasl_passwd
service postfix reload
Everything you need to send emails through Postfix using your email provider’s SMTP server should now be in place. Before proceeding you should test that it is working.
If the email doesn’t arrive check in ‘/var/log/sysIog’ for errors and make sure that you can successfully send emails using the same settings from an email client (such as Thunderbird).
Now that that is working we only need to tell Postfix to forward all emails sent to the root user to an external email account. Open ‘/etc/aliases’ and add the following line:
root: admin@anotherdomain.com
If you want to forward emails for other users than root you simply add them to the list as well. When you are done run:
newaliases
That’s it. If everything is configured properly all emails sent to the root user will now be forwarded to admin@anotherdomain.com.
echo "Testing Postfix forwarding" | mail -s "Test email" root
If that was all you needed then you can stop here, but you are now sending unencrypted emails through the internet containing potentially sensitive information. If you think that sounds dangerous then continue to the second part were we will set up some automated GPG encryption.
A warning about restrictive SMTP servers and the From header
It is possible that these settings won’t work with your particular email provider. I’m using a Gmail account to forward email. It isn’t my primary email provider, but there are practical reasons for using it in this case. Unlike some other email providers Gmail does not care about what you specify in the ‘From’ header. It will overwrite whatever is in it with the Gmail user you used. This simplifies things greatly when forwarding local emails since you would otherwise have to change the contents of the header before sending it out. Postfix has the ability to replace addresses in outbound email (just google smtp_generic_maps or sender_canonical_maps and you should find instructions for how to configure Postfix), however, depending on how an application fills out the headers in emails they send out this may not work reliably in all situations. I tried to set this up with a more restrictive Zoho.com email account, but I could not get it to forward cron error messages.
If you need this for your email provider, and if you manage to set it up successfully, please leave a comment explaining how you did it. For everyone else; just use a Gmail account. It’s easier.
Part 2 – Encrypting outgoing email with GPG
It is possible that some of the applications sending email to your local accounts might send data that you don’t want any stranger on the internet to see. In my paranoid mind that just isn’t acceptable, and so we will be adding a layer of encryption to Postfix using GPG-Mailgate. GPG-Mailgate is a content filter script for Postfix that will encrypt a received email if there is a public GPG key available for its recipient, and if the email is not already encrypted. It is relatively easy to install and configure, but be warned that if you do not configure it correctly it will probably fail silently and send out empty emails.
First, either download the source code from Github or clone it.
yourpublic.key is the public part of your GPG key pair. If you don’t have one already then your will need to create one. How to do that is beyond the scope of this guide, but it isn’t difficult.
Check that everything worked and that the key is in place.
sudo -u gpgmap /usr/bin/gpg --list-keys --keyid-format long
This should give you something like this.
/var/gpg/.gnupg/pubring.gpg
 ---------------------------
pub 4096R/0123456789ABCDEF 2014-09-17
uid                        Your Name <admin@anotherdomain.com>
sub 4096R/FEDCBA9876543210 2014-09-17
Save whatever you have instead of ‘0123456789ABCDEF’. This is the identifier of your public key and you will need it later.
Add the following to the end of ‘/etc/postfix/master.cf’:
#GPG-Mailgate
gpg-mailgate unix - n n - - pipe
flags= user=gpgmap argv=/usr/local/bin/gpg-mailgate.py ${recipient}

127.0.0.1:10028 inet n - n - 10 smtpd
  -o content_filter=
  -o receive_override_options=no_unknown_recipient_checks,no_header_body_checks
  -o smtpd_helo_restrictions=
  -o smtpd_client_restrictions=
  -o smtpd_sender_restrictions=
  -o smtpd_recipient_restrictions=permit_mynetworks,reject
  -o mynetworks=127.0.0.0/8
  -o smtpd_authorized_xforward_hosts=127.0.0.0/8
Make certain that the user name and script location matches what you used above.
Add the following to ‘/etc/postfix/main.cf’:
content_filter = gpg-mailgate
And reload Postfix’s settings.
service postfix reload
Create a configuration file for GPG-Mailgate at ‘/etc/gpg-mailgate.conf’ and add the following to it:
[default]
# whether gpg-mailgate should add a header after it has processed an email
# this may be useful for debugging purposes
add_header = yes

# whether we should only sign emails if they are explicitly defined in
# the key mappings below ([keymap] section)
# this means gpg-mailgate won't automatically detect PGP recipients
keymap_only = yes

[gpg]
# the directory where gpg-mailgate public keys are stored
# (see INSTALL for details)
keyhome = /var/gpg/.gnupg

[logging]
# For logging to syslog. 'file = syslog', otherwise use path to the file.
file = syslog
verbose = no

[relay]
# the relay settings to use for Postfix
# gpg-mailgate will submit email to this relay after it is done processing
# unless you alter the default Postfix configuration, you won't have to modify this
host = 127.0.0.1
port = 10028

[keymap]
# You can find these by running the following command:
# gpg --list-keys --keyid-format long user@example.com
# Which will return output similar to:
# pub 1024D/AAAAAAAAAAAAAAAA 2007-10-22
# uid Joe User <user@example.com>
# sub 2048g/BBBBBBBBBBBBBBBB 2007-10-22
# You want the AAAAAAAAAAAAAAAA not BBBBBBBBBBBBBBBB.
#user@example.com = <gpg key id>
admin@anotherdomain.com = 0123456789ABCDEF
root@server.yourdomain.com = 0123456789ABCDEF
Replace the addresses and keys on the last two lines with the email address you want to forward emails to and the identifier of the public key you imported earlier.
The final line is a bit of a hack. GPG-Mailgate uses the ‘To’ header to find the GPG key to use when encrypting email. If it can’t find a matching entry in the configuration file it will not encrypt it. This creates a minor complication since Postfix doesn’t rewrite the ‘To’ header when forwarding local email. Any email sent to the root user will therefore have a ‘To’ address of ‘root@server.yourdomain.com’; which GPG-Mailgate won’t recognise. To fix this we add the local email address to the configuration file as well.
This should be all. Now test that everything is working.
echo "Testing GPG encryption" | mail -s "Test GPG" admin@anotherdomain.com
echo "Testing GPG encryption to root user" | mail -s "Test GPG root" root
These commands should both send an encrypted email to admin@anotherdomain.com. If it doesn’t work check ‘/var/log/syslog’ for errors.
If GPG-Mailgate did not encrypt your emails then it is likely that it did not find a matching public key. Make sure that the keys and addresses in ‘/etc/gpg-mailgate.conf’ are correct.
If you get empty messages then it is likely that GPG returned an error to GPG-Mailgate. This will cause GPG-Mailgate to fail silently. Make sure that the gpgmap user has the permissions needed to use the GPG keys in ‘/var/gpg/.gnupg’ and that gpgmap is used by Postfix when running GPG-Mailgate.
If you get an error about a missing GnuPG module then you either set the wrong permissions for the GnuPG folder and its contents, or you placed it in the wrong python folder.
If everything is working than this should be it.
You can now send email through an external SMTP server from the command line
All emails sent to the root user are forwarded to an external email address
All emails sent to admin@anotherdomain.com are automatically encrypted before they leave the server
This short guide will show how to communicate with the FRDM-KL25Z using the Serial and USBSerial classes from the mbed library in Linux.
Serial and USBSerial are two different methods for creating serial connections using mbed. USBSerial creates an emulated serial port over a normal USB port while Serial uses the built in serial port (if there is one). In the case of the FRDM-KL25Z this can be done through the virtual serial port provided by OpenSDA.
This small example will create two serial connections; one using the serial port built into OpenSDA, and one over the normal USB port. It will pass everything given to either interface on to the other interface.
Compile the code and load it onto your FRDM-KL25Z, then connect it to your computer using both USB ports and run the following command.
ls -l /dev/ttyACM*
Your output should look something like this.
crw-rw---- 1 root dialout 166, 0 Aug 19 13:56 /dev/ttyACM0
crw-rw---- 1 root dialout 166, 1 Aug 19 14:19 /dev/ttyACM1
Each of these device files are connected to one of the serial interfaces on the FRDM-KL25Z. To use them you will first have to add your user to the dialout group.
sudo usermod -a -G dialout USERNAME
You can use any terminal emulator of your choice to connect to these serial ports. I will be using minicom for this example.
Open two terminals. On the first run:
minicom -b 9600 -D /dev/ttyACM0
And in the second:
minicom -b 9600 -D /dev/ttyACM1
‘-b 9600’ sets the baud rate. The default value used by mbed is 9600.
If everything is working correctly whatever you write in one terminal should now appear on the other, and vice versa. If it doesn’t create new lines when you press ‘enter’ and it instead jumps to the beginning of the current line, tell minicom to add linefeeds by pressing ‘Ctrl-a a’.
By Viswesr (Own work) [CC-BY-SA-3.0 (http://creativecommons.org/licenses/by-sa/3.0)%5D, via Wikimedia CommonsI recently bought a Freescale FRDM-KL25Z to experiment with ARM and embedded systems programming, and I thought I should share my experiences with using it in a completely open source Linux environment so that others may learn from my (many) mistakes. The FRDM-KL25Z is an inexpensive development platform built around an ARM Cortex M0+ based microcontroller. It has support from several commercial development environments, but there is a lack of documentation for how to make it work on Linux using nothing but open source software. After some research, trial and error, and almost bricking the thing, I finally got everything to work.
This post will show you how to set up a development environment around the FRDM-KL25Z using the GCC toolchain and mbed library. To make it more general I will not use any IDE. This will all be by hand. Once you have it working it should not be a problem
I had to buy a freedom board for a school class, and I was frustrated at first to find that there was no support for the linux platform. I'm personally a fan of the teensy ARM microprocessors which are supported by GCC or the Arduino IDE, now I can add the new micro to my growing collection. Thanks again for the great article!
to set up an IDE around it as well, but that is left as an exercise to the reader.
Getting everything to work will require a few steps.
Install the mbed firmware
Install the GCC ARM toolchain
Set up debugging tools
Download and build the mbed library
Create a simple program
Installing the mbed firmware
There are several firmware variants you can install on your FRDM-KL25Z. You can use whichever version you like as long as it supports the CMSIS-DAP debugging interface (i.e. any firmware other than what came pre-installed). The one I have chosen to use is the mbed firmware. It is easy to use and performs a sanity check on any binaries you give it to make sure that you don’t accidentally brick your device (which you very well might do if you are not careful).
To install the mbed firmware first download the newest version. At the moment (2014-08-13) that would be this one.
Start the board in bootloader mode by holding down the reset button while plugging in the board using the SDA USB port.https://mbed.org/handbook/CMSIS-DAP
A mass-storage device named BOOTLOADER will appear. If you were using Windows it would be enough to copy the firmware file to this device and restart the board, but since you are using Linux it isn’t quite that simple. You first have to mount it using the ‘msdos’ file system type.
sudo mount -t msdos /dev/sdd /mnt
In my case the board shows up as /dev/sdd. This may, of course, be different in your case. Copy the firmware file to /mnt and restart the board. You should now see a mass-storage device named MBED.
To test that everything is working you can try one of mbed’s example programs. Sign in or create an account and click “Import Program”. This will take you to their online IDE where you can export the program to a ‘.bin’. Copy this file to the MBED device and press the reset button. If everything is working then the led will probably start blinking (depending on the example you chose).
You could stop here and just use mbed’s online IDE. The rest of this guide will show you how to compile your own programs offline with GCC and the mbed library, and how to get the USB debugging interface to work.
Install the GCC ARM toolchain
The next step is to install the tools needed to compile your own programs. For this you want the gcc-arm-none-eabi from launchpad. Download the one ending with linux.tar.bz2, unless you want to compile it from source.
Just extract it somewhere, add the bin directory to you path variable, and you are done.
Set up debugging tools
With any new firmware the FRDM-KL25Z will support USB debugging using the CMSIS-DAP debugging interface. To use it we need to install OpenOCD and hidapi.
Open ‘tcl/target/kl25.cfg’ and add the following text to the end.
adapter_khz 50
$_TARGETNAME configure -event gdb-attach {
    halt
}
make
sudo make install
Permissions
By default only the root user has access to the device files used for debugging. If you want to give a normal user permission to use the debugging tools you will have to set up some udev rules.
Create the file ‘/etc/udev/rules.d/45-mbed_debugger.rules’ and add the following to it.
This will give all users in the ‘plugdev’ group read and write access to all relevant device files. You could use any group you want, or just a specific user.
To test that it is working run the following command as a non-privileged user with the FRDM-KL25Z plugged in.
If it complains about not finding the libhidapi-hidraw.so.0 library check that ‘/usr/local/lib’ is in ‘/etc/ld.so.conf’, run ‘ldconfig’, and try again.
If you now open a second terminal you should be able to connect to the device with GDB.
The mbed development platform consists of an online browser based IDE and compiler (as you saw earlier), and an open source library that simplifies the development of embedded systems code by hiding low level details from the programmer. This is part we want. To use the library offline without the IDE you will have to download and compile the source code.
git clone https://github.com/mbedmicro/mbed.git
cd mbed/workspace_tools
In addition to the main mbed library, the repository contains a number of other useful libraries that can be installed.
When it is done you can find the compiled libraries in ‘build’. Move them to where you want the mbed libraries to be located.
Create a simple program
Finally everything that you need to build your own programs is in place, but before you can start programming we will have to pull all of the pieces together and show how to compile a program from source code. For this example we will, of course, create a simple program that turns the three LEDs on and off.
Most of the work needed to build a program for the FRDM-KL35Z has already been taken care of for you by the mbed library. All you must do is link everything together and compile it. You could set this up by hand, but I recommend you start out by using this makefile. It will set up all the paths and include directories for you. What is left is to set the path to the mbed libraries in MBED_PATH, set the program name in TARGET, add any local source and header folders to SRC_DIRS and INC_DIRS, and to tell it which mbed libraries to use.
Next, create the file ‘src/main.cpp’ and add the following to it.
#include <mbed.h>

Ticker tick;

DigitalOut led1(LED_RED);
DigitalOut led2(LED_GREEN);
DigitalOut led3(LED_BLUE);

void flip() {
    led3 = !led3;
}

int main()
{
    led3 = true;

    //Flip the blue LED every 5 seconds
    tick.attach(&flip, 5.0);

    //Flip the red and green LED once every second
    while (true) {
        led1 = true;
        led2 = false;
        wait (1.0);
        led1 = false;
        led2 = true;
        wait (1.0);
    }
}
Don’t forget to add the ‘src’ folder to SRC_DIRS in the makefile, then compile with ‘make’.
If everything is working as it should it should now create a ‘build’ directory with the file ‘mbed.bin’ in it (assuming you did not change TARGET). Copy this file to the MBED device, wait for it to load it, and then press the reset button. The LED should now start blinking in different colors.
That’s all. You are now ready to start programming your own programs. Build something interesting.
Some helpful tips on how not to lock your FRDM-KL25Z and save yourself much pain
Unless you are careful you will sooner or later manage to “lock” your FRDM-KL25Z. This happens when you accidentally enable the security bits. If you have not set up the mbed library (in particular the *.ld files) correctly then this could happen very easily. The mbed firmware will protect you from this mistake by refusing to flash binaries with the security bits enabled, but there are ways to bypass it using the debugger and OpenOCD.
To check if you have set the security bits open the binary in a hex editor and look at the contents of address 0x0000040C. The last two bits should be “10”. If it isn’t, something is wrong and you should NOT attempt to flash this binary to the board. Seriously, don’t do it!
If you ignored my advice and flashed the board with a binary that had the security bits enabled then you will have to unsecure it. This can be a little complicated, but if you read these instructions and still didn’t follow my advice then it’s your own fault. Supposedly there are tools you can use to unsecure the device, but I have not found any that are free and works in Linux. Fortunately, some variants of the FRDM-KL25Z firmware will unset the security bits when they are installed. You can then reinstall the firmware you want to use. This can require some trial and error, but I have had success with the MSD-DEBUG-FRDM-KL25Z_Pemicro_v114.SDA firmware.
Save yourself a lot of trouble and make sure that you don’t do this in the first place. Unless you know what you are doing only program the device by copying binaries to the MBED mass-storage device.
Caps Lock must be the second most useless key on my keyboard (what does Scroll Lock even do?) and one of the first things I usually do after installing a new Linux system is to rebind it to something useful, such as backspace. This is very easy to do (in X11 at least). Just call this script on login.
#!/bin/sh

#Set the keyboard layout to "Swedish"
setxkbmap -layout se

#Replace Caps Lock with Backspace
setxkbmap -option caps:backspace

#Required to allow key repeat
xmodmap -e "clear Lock"
You can replace Caps Lock with other keys by changing ‘caps:backspace’ to whatever you want.
It is sometimes the case that an application will not allow you to paste in text, forcing you to write it out by hand (either because it is poorly written or because of perceived security risks). These instructions are the results of having to manually enter long and complex passwords for virtual Windows machines one time too many, and will show you how to bypass such restrictions using a simple script.
#!/bin/sh#This script will type out the content of the Klipper clipboard as if the user had typed it themself.#Copy the content of the KDE clipboardto_write=$(qdbus org.kde.klipper /klipper getClipboardContents)
#Clear the clipboard. Uncomment this line if you will be copying anything sensitive.
#qdbus org.kde.klipper /klipper clearClipboardHistory
#Wait for one second to give the user time to release any keys that may have been pressed.
sleep 1
#Type out the content of the clipboard
xdotool type--clearmodifiers"$to_write"
Common problems
If the output does not match the content of the clipboard it is possible that xdotool is using the wrong keyboard layout. This can be fixed by adding ‘setxkbmap -layout LAYOUT’ to your shell profile, where LAYOUT is the keyboard layout you want (e.g. ‘se’ for Swedish).
Try not to press down any modifier keys (Ctrl, Shift, Alt, etc.) when running the script. With ‘–clearmodifiers’ xdotool will attempt to unset all modifiers, but this will not always work. The script will type out anything you give it as if you had typed it out yourself. This includes things like keyboard shortcuts. Strange and dangerous things can happen if you are not careful. The script will wait for one second before doing anything to give you time to take your hands of the keyboard.
Create a shortcut
To create a keyboard shortcut for the script in KDE4, go to ‘System Settings -> Shortcuts and Gestures -> Custom Shortcuts’, then ‘Edit -> New -> Command/URL’. Under ‘Trigger’, select the keyboard shortcut you want, and under ‘Action’, give it the path to the script.
Pasting passwords to Windows machines running in VirtualBox
This was the reason why I wrote the script in the first place. To paste a password, simply copy it and click on the Windows password field, then press the host key (right Ctrl) so that VirtualBox does not capture the keyboard, followed by the keyboard shortcut you chose. The script will then type out the password as if you had typed it out yourself, bypassing the disabled copy/paste functionality.
This guide will show how to set up a simple backup system using Duply, that creates encrypted incremental backups of client data and stores them both on a central backup server and on a secondary offsite server. All backups are encrypted by the clients using GPG so that no data could be compromised if someone gain access to the backup servers. The guide assume that Debian is used, but the instructions should work on any Linux distribution with only minor changes.
Duply backup archtecture
The guide provide step-by-step instructions for setting up a backup server, a secondary server, and a single client. The following names are used to identify them.
Client: client.example.com
Backup server: server.example.com
Offsite server: offsite.example.com
Duply/Duplicity
Duply is a front end to the Duplicity backup application that give you a more user friendly interface and simplifies common tasks. Duplicity isn’t the most powerful backup application available, but it is a very good choice when you don’t need the functionality of, for example, Amanda or Bacula. The strength of Duplicity is its simplicity and ease of use, particularly when combined with Duply. You can, with a few commands and two simple configuration files, create a complete backup schedule with client side encryption.
Another advantage of using Duplicity is that everything is handled by the client. All you need from the server is the ability to store files on it. Other, more advanced, backup solutions typically use some form of backup and scheduling daemon on the server. With Duplicity it is enough if you have remote SSH access to an account on the server; everything else is handled client side. This is particularly useful when backing up desktops and laptops that are not always online.
There are of course disadvantages to using Duplicity. Since Duplicity doesn’t use a central server for managing backups it will not scale well. Each client is responsible for what to back up and when to back it up, and must be configured and managed separately. This makes Duplicity an excellent choice for small networks where there are only a handful of machines to back up, but for larger networks you may want to use something else.
Step 1: Install Duply (client.example.com)
First install Duply and Duplicity on the client.
# apt-get install duply
It is possible to do everything in this guide with only Duplicity. Duply simply provides an interface for Duplicity that is easier to work with. If, for some reason, you don’t want to use Duply you could instead use Duplicity directly.
Step 2: Add a backup folder on the server (server.example.com)
You need an account on the server to store backups on. You could use a single account for backing up several client machines, but I would recommend that you create separate accounts for each client and only give them a restricted shell. This will limit the potential damage that could be done by compromised or misbehaving clients.
Step 2.1: Install RSSH
If you have not done so already, first install RSSH. RSSH provides a restricted shell that only allow a user to perform actions needed for SFTP, SCP and rsync.
# apt-get install rssh
By default RSSH will not allow rsync to be used. We will need this later, so edit ‘/etc/rssh’ and enable rsync access.
# set the log facility. "LOG_USER" and "user" are equivalent.
logfacility = LOG_USER
allowscp
allowsftp
allowrsync
# set the default umaskumask = 027
Step 2.2: Create a client user account
Next you need to create a user account and backup folder for the client. How you do this is up to you and your particular needs (and paranoia). I will give two examples of how you could set this up. By simply storing backups in the home directory of the user, and a slightly more complex method that should work better if you are backing up several clients.
Simple solution
A simple solution is to give each client a user account on the server and let each client store their backups in their home directories. This is easy to set up, but if you wish to copy all backups to a secondary offsite server your will have to either do this as root, or give the offsite server access to each client account separately.
When creating client user accounts on the server I recommend disabling password based login so that only key based SSH authentication is allowed, and to only give clients restricted shell access to the server.
A warning should be made here. If you have more than one user on the server and you are using the default umask, then other users will (probably) have read access to your backups. This should not be a problem if the backups are encrypted, otherwise you may want to at the very least change the umask, or use the advanced solution.
Advanced solution
A somewhat more advanced solution is to give each client a separate user account on the server, but store all backups in a central backup folder and use ACLs to give a single user (in this case backup-duply) read access to all backups. This requires a few more steps, but makes it possible to copy all backups to a secondary server using only the one backup account.
Use ACLs to give backup-duply read access to the backup folder and all subfolders. This will be inherited by new folders and backups when they are created.
You will need to give the client SSH access to the new user account on the server.
If the client does not already have an SSH key, you must first create one.
$ ssh-keygen
Save it in the default location (~/.ssh/id_rsa). You could also create a separate set of keys for Duply, but that will not be covered by this guide. Since the key will be used non-interactively, you should give it an empty passphrase. This will create two keys. The private key id_rsa, and the public key id_rsa.pub. You must always keep the private key secret!
The next step is to add the public key to the list of authorized keys on the client’s user account on the server.
On the server, create the file ‘/home/backup-client/.ssh/authorized_keys’ if it does not already exist.
Next, copy the content of the client’s public key (id_rsa.pub) to the authorized_keys file on the server.
Finally, you must add the server’s public key (/etc/ssh/ssh_host_rsa_key.pub) to the client’s list of known hosts (~/.ssh/known_hosts). You can do this manually or, alternatively, if you try to connect to the server it will offer to do this for you. Adding the key manually is more secure and is the recommended way to do this if you do not trust the network in-between the client and the server. Until the keys are in place and the server and client can authenticate each other it is possible to perform a man-in-the-middle attack.
To test that everything is working, try to connect to the server.
$ ssh backup-client@backup.example.com
It should give you the following message.
This account is restricted by rssh.
Allowed commands: scp sftp rsync
Step 4: Create GPG keys (client.example.com)
If you want to encrypt or sign your backups you will need a GPG key. If you do not already have a key the next step will be to create one.
To create a GPG key use the command:
$ gpg --gen-key
Then choose:
(1) RSA and RSA (default)
You can use the defaults for the rest if you wish, but choose a strong passphrase. I recommend you use some form of password generator to create it. Make a copy of the passphrase and store it somewhere safe. You should also create a backup of ‘~/.gnupg/’. You will not be able to decrypt your backups if you lose them.
In the end you should get something like:
$ gpg --list-keys
/root/.gnupg/pubring.gpg
------------------------
pub   2048R/C8B4OI9S 2014-05-16
uid                  Your Name <Yourname@example.com>
sub   2048R/JF5PWSHP 2014-05-16
Here, C8B4OI9S is the name of the main signing key, and we have one subkey JF5PWSHP for encryption. These keys are enough to create encrypted and signed backups.
Step 5: Create a backup profile (client.example.com)
It is now time to set up a Duply backup profile. The following command will create a new profile named “backup_all”.
$ duply backup_all create
This will create a folder ‘~/.duply/backup_all/’, where all relevant configuration files are stored. The backup schedule and other options are listed in ‘~/.duply/backup_all/conf’. The following is a sample configuration file using the GPG keys created earlier.
#GPG encryption keyGPG_KEYS_ENC='JF5PWSHP'#GPG signing keyGPG_KEY_SIGN='C8B4OI9S'#GPG passpraseGPG_PW='YOUR_PASSPHRASE'GPG_PW_SIGN='YOUR_PASSPHRASE'#Compress backups using bzipGPG_OPTS="--compress-algo=bzip2 --bzip2-compress-level=9"#Send backups to server.example.com using sftp over SSH. Uncomment the one matching your setup.#Simple solution. Store backups in ~/backup#TARGET='sftp://backup-client@server.example.com/backup/'#Advanced solution. Store backups in /var/backup/#TARGET='sftp://backup-client@server.example.com//var/backup/backup-client/'# base directory to back upSOURCE='/'# Time frame for old backups to keep, Used for the "purge" command.# see duplicity man page, chapter TIME_FORMATS)# defaults to 1M, if not setMAX_AGE=6M
# Number of full backups to keep. Used for the "purge-full" command.# See duplicity man page, action "remove-all-but-n-full".# defaults to 1, if not setMAX_FULL_BACKUPS=3# activates duplicity --full-if-older-than option (since duplicity v0.4.4.RC3)# forces a full backup if last full backup reaches a specified age, for the# format of MAX_FULLBKP_AGE see duplicity man page, chapter TIME_FORMATS# Uncomment the following two lines to enable this setting.MAX_FULLBKP_AGE=1M
DUPL_PARAMS="$DUPL_PARAMS --full-if-older-than $MAX_FULLBKP_AGE "# verbosity of output (error 0, warning 1-2, notice 3-4, info 5-8, debug 9)# default is 4, if not setVERBOSITY=5# temporary file space. at least the size of the biggest file in backup# for a successful restoration process. (default is '/tmp', if not set)TEMP_DIR=/tmp
# more duplicity command line options can be added in the following way# don't forget to leave a separating space char at the endDUPL_PARAMS="$DUPL_PARAMS --extra-clean --num-retries 1"
Next, you will have to create an exclude file ‘~/.duply/backup_all/exclude’. This file tells Duplicity which files to back up, and which to ignore.
The following is a sample exclude file that will back up all files in ‘/etc’, ‘/home’ and ‘/var/www’, except for temporary files.
- **/*~
+ /etc
+ /home
+ /var/www
- **
The format is very simple. Duplicity will check each file against the rules in this file, starting from the top, until it finds a rule that matches. If the rule is preceded by a ‘+’ the file will be backed up, and if it is preceded by a ‘-‘ it will be ignored. For example, the file ‘/etc/resolv.conf’ will match the rule ‘+ /etc’ and be backed up, while ‘/etc/resolv.conf~’ will match the rule ‘- **/*~’ and be ignored. The last rule ‘- **’ tells duplicity to ignore all files that didn’t match an earlier rule.
To test that everything is working, run:
$ duply backup_all backup
If this finishes without errors then all that is left to do is to create a cron job. You should also make a backup of ‘~/.duply/’. You will need these configurations files when restoring backups.
Step 6: Copy backups to an offsite server (offsite.example.com)
You should always have at least one additional copy of all backups stored offsite. A simple way to this is to use rsync to copy all backup data to a secondary server. This can be done in several ways depending on which solution you chose in step 2, and on your own requirements. I will give two examples where the offsite server connects to and pulls the backup data from the primary server. You can also do the opposite and let the primary server connect to the offsite server and push data to it.
Simple solution
If you followed the earlier steps for the simple solution you need to give the offsite server SSH access to each client account on the primary server. Assuming that the previous steps have been taken to give the client SSH access to the server, all you need do is copy the contents of ‘~/.ssh/id_rsa.pub’ from the offsite server to the authorized_keys files in each client account on the primary server.
Next, add the following cron job to the offsite server for each client account.
@daily /usr/bin/rsync -a --delete backup-client@server.example.com:/home/backup-client/backup/ /your/backup/folder/backup-client/
Before adding this line to crontab you should try the command with ‘–dry-run -v’ enabled to see that it does what you intended. You may also want to leave out ‘–delete’ if you don’t want old backups to be removed from the offsite server once they have been deleted from the primary server.
This solution is quite simple to implement when you only have one or two machines backed up to separate user accounts on the server, but it quickly becomes impractical since you will have to remember to update crontab each time you add or remove a client. This could also create a potential security risk since the offsite server will have write permissions for the backups on the primary server. If the offsite server were to be compromised it could potentially delete backups from the primary server.
Advanced solution
If you followed the earlier steps for the advanced solution you need to give the offsite server SSH access to the backup-duply account. This is done in the same way as in the simple solution described above.
Next, add the following cron job to the offsite server.
@daily /usr/bin/rsync -a --delete backup-duply@server.example.com:/var/backup/ /your/backup/folder/
Before adding this line to crontab you should try the command with ‘–dry-run -v’ enabled to see that it does what you intended. You may also want to leave out ‘–delete’ if you don’t want old backups to be removed from the offsite server once they have been deleted from the primary server.
This solution will create a copy of all backups for all clients with a single command. It also only gives the offsite server read permission for the backups on the primary server. Even if the offsite server were to be compromised the backups on the primary server would be safe.